You can apply colors to the worksheet as a whole, to individual cells in the worksheet, and to the borders of cells and ranges. You can also apply patterns to cells. The following sections describe how to apply colors to worksheets and cells.
Note All color dialogs in Formula One for Java use the same color palette. You can change the colors that appear in the color palette. For information, see Setting Up the Color Palette.
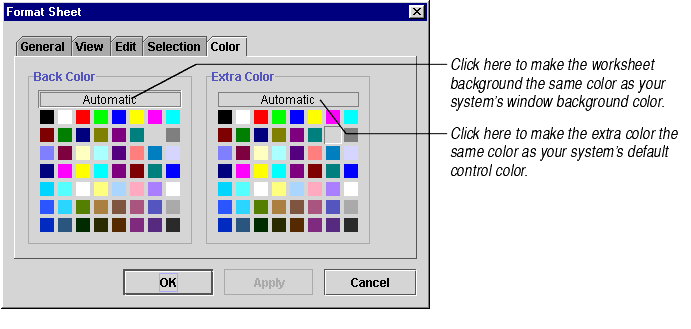
The Workbook Designer allows you to define a background color for a worksheet. When you do this, all cells in the worksheet will have the same background color. You may also define an extra color, which is used to fill the area around the worksheet when a user scrolls to the right or bottom edge of the worksheet.
Note You may change the colors of individual cells using the Format Cells option. If colors have been applied to individual cells using the Format Cells option, those colors remain even after you change the worksheet background color. For information, see Setting Cell Fill Colors.
To define a background and extra color for your worksheet(s):
You can fill individual cells or ranges of cells with different colors from the color palette.
To fill a cell or range of cells with colors:
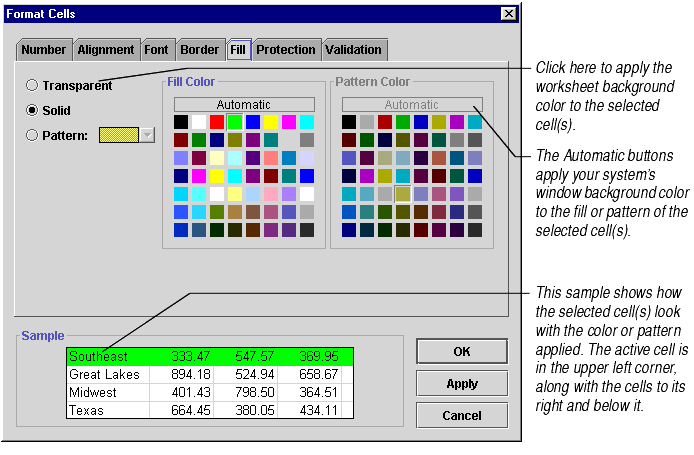
Note To change the fill color of the selected cell(s), you can also use the Fill Color button on the Formatting toolbar.
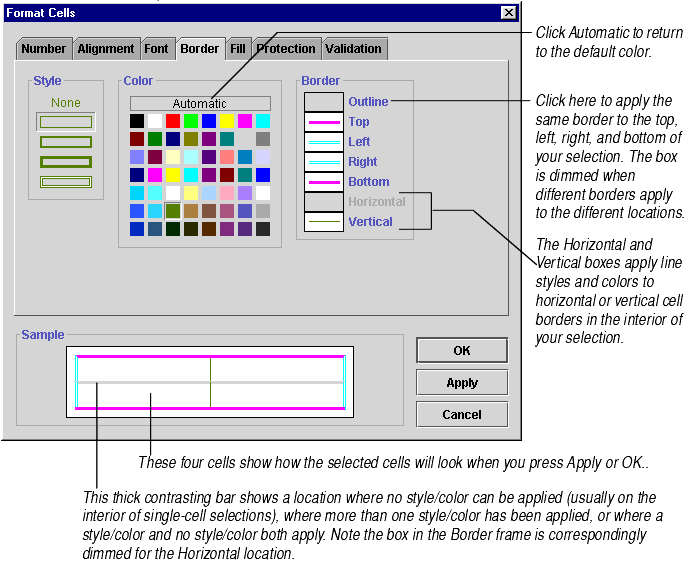
You can apply borders to the top, bottom, left, and right sides of a cell. You may also select a range of cells and place borders on different locations of the cells in that range.
To add borders to cells: