Photos:Projects:Frank and Rosa Book:Construction Notes
 |
||
 |
||
 |
||
 |
||
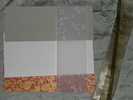
Paper, ribbon, and fabric used in making the book. The very astute may recognize the green silk.
The pressed piece silk fabric is glued to the front of the book board.
The silk is glued to the edges & underside. I used acid free gluestick (since I seem to have run out of PVA) and burnished it down well with my teflon bonefolder. Then I pressed it down with a hot iron to make it even flatter.
I punched the holes for the stitching and filled them with eyelets. This board became the back cover when I punch 2 extra holes in it. (The covers are supposed to have 4 holes while the signatures have 6.) The ribbon is temporarily attached with double stick tape.)
 |
||
 |
||
 |
||
 |
||
The insides of the covers were covered by the same paper I used on the edges. They'll need another layer after I attach the ribbon, since the ribbon edges should get tucked under, but that's fine.
The seven signatures folded, assembled , and collated. None of the card stock was wide enough to just fold in half to make 6x9" pages (being either 11" or 12" wide), so I had to make 6x9 and 6x9 3/4 pages and glue them together. That worked pretty well. The outside leaves also had to have the decorative edging glued on them. I'm pretty pleased with the way the printed vellum over the green paper echoes the cover design.
My solution to the ugly reverse side of the vellum outer layers was to put the decorative paper on both sides. This also adds some strength to those sheets.
Two signatures down, five to go.
 |
||
 |
||
 |
||
 |
||
My solution to the problem of how to get a single sheet of vellum in the center of the signatures without being ugly: sew in a piece of decorative paper and tip in a single sheet.
A sheet of vellum half tipped in. This also hides the sometimes sloppy sewing from where I wrapped the gold thread around the waxed linen thread.
The book looks nicer with all the signatures trimmed to be mostly even.
Ta-da! The (almost) finished product. I accidentally glued the frame with the double happiness character upside down. I've since fixed that, but need to take a new picture (as well as a pictures of the finished spine.