

The goal of this project was to construct a 3D model of the Dome of the Rock, an Islamic religious structure built in Jerusalem in the 7th century. The structure is built around the tip of the Temple Mount, the "Rock" of the building's name, which holds great religious signifigance and is the subject of several Muslim myths. The structure itself is an octagon enclosing another octagon of columns enclosing a circle of columns, which is the smallest enclosing circle of the rock. Our model captures not only the unique geometry of the structure, but also its interesting textures. Most of the inside of the Dome of the Rock is covered with mosaics and generously interspersed with marble. Given the information available to us, we made a model reconstructing as closely as possible the 7th century appearence of the building.
This project was created by a four member team as a final project for the class 6.837 Computer Graphics at MIT in the fall of 1997. The material found in this site was written by various team members for the 6.837 final paper.
Members of the team:
Since its completion, the Dome of the Rock has been damaged, repaired, and modernized many times. The most notable of these revisions was implented by Sultan Sulayman the Magnificent in the 16th century. However, the current building still has many of the original mozaics and decorations. The basic shape of the building is also the same.
The goal of our project was to make a computer model of the Dome of the Rock. There were several motivations for this project. The Dome of the Rock contains a rich variation of colors and textures. It is therefore a challenging problem to model the building accurately. The Dome offered an oppartunity to incorporate large scale 3D modelling, image mapping and procedural texturing into one project.
The Dome of the Rock is not easily accesible to students. It is located in a politically unstable area, and religious concerns limit access for researchers. We wanted to create a model so accurate it could be used in addition to photographs and/or actual visits as an aid in teacing. We decided to create a model that attempted to reconstruct the appearance of the Dome in the 7th century. This was done primarily to simplify modelling, since many details have been added later.
The schedule of the project was as follows:
| Checkpoint 1 Friday, October 24 |
Turn in proposal Explore AC3D software Research texturemapping |
|---|---|
| Checkpoint 2 Friday, October 31 |
Have the basic geometry of the building done Fit the different pieces together |
| Checkpoint 3 Friday, November 7 |
Have a complete model Improve the geometry |
| Checkpoint 4 Friday, November 14 |
Have all images scanned in, ready to be mapped Have a plan for places which we don't have pictures of Look at lighting and animation software |
| Checkpoint 5 Friday, November 21 |
Inside of building complete with textures Plan for presentation (lighting, sounds, etc...) First draft of report done |
| Final Project Reports Due Wednesday, November 26 |
Report all finished and turned in Start rendering |
| Final Project Presentations Saturday, December 6 |
Present our project |
This schedule had to be modified as we went along due to unforseen difficulties with the modeling tools avaliable to us.
We have managed to finish almost all of what we intended to do in this project, despite some serious setbacks. We have built a model of the Dome of the Rock that is geometrically precise and that is textured in an approximation to the actual structure (see section on model accuracy).
Our plan was to create the geometry in some modeling language, port the model to RenderMan and add textures there. RenderMan is a ray tracer with powerful features for texturing, allowing procedural texturing, bump mapping and displacement mapping. We decided not to model the geometry directly in RenderMan since RenderMan is not "interactive" and does not allow walk-throughs. A RenderMan camera angle must be specified before any image can be produced by the RenderMan renderer. This makes modeling in RenderMan time consuming, since one has to render several images of an object to look at it from different angles.
The first main issue that we faced was deciding what language to use for modeling. AC3D was recommended, so we tried to use that. Unfortunately we discovered that it did not give us the necessary accuracy. The AC3D language is based on a "click and drag" interface. One can not type in an exact rotation, translation, etc. in the interface, and the AC3D file format is not amenable to direct manipulation. Because of these problems with AC3D, because we were all familiar with OpenInventor, and because we found it much easier to specify precise measurements in Inventor, we decided to switch modelers. The rock was still modelled in AC3D, however, since it was easier to create objects one does not have measurements for in AC3D. We were a bit concerned about combining Inventor and AC3D objects, but we managed to do so with very minor difficulties.
We were at this point about one week behind schedule because of the modeler switching. Kari Anne, Tara, and Marleigh completed their geometry at about the same time. Fitting pieces together was suprisingly trivial, since we'd all used the same scale (meters), direction (z is up, y is north), and measurements from the same blueprints. Mike was not able to finish his geometry, so Tara and Kari Anne ended up finishing the rest of the geometry with some help form him. The geometry was ready to be converted to RenderMan and textured when The Great QuadMesh Fiasco occured.
Tara introduced us to an elegant way of coding in OpenInventor using QuadMeshes. QuadMeshes mostly take a long string of ordered points and turn them into an object. This prevents constant calls to IndexedFaceSet and is quite handy on curved surfaces. Therefore, we all used QuadMeshes extensively in our code. Unfortunately the IV to RenderMan converter could not handle QuadMeshes. Lots of our code broke when ported to RenderMan and needed to be redone. Tara fixed it by manually changing all the RenderMan files. Howerer, the convertion problems set us back quite a bit.
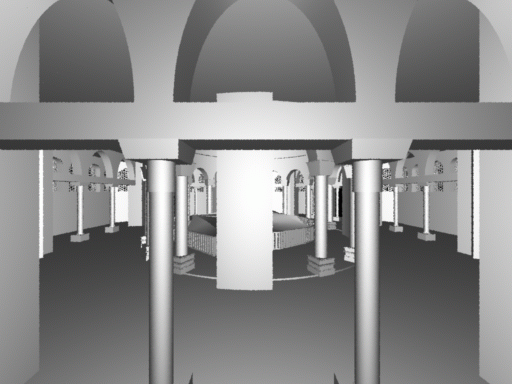
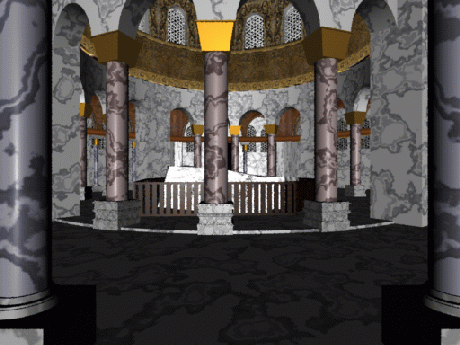
A view from just inside of the south door
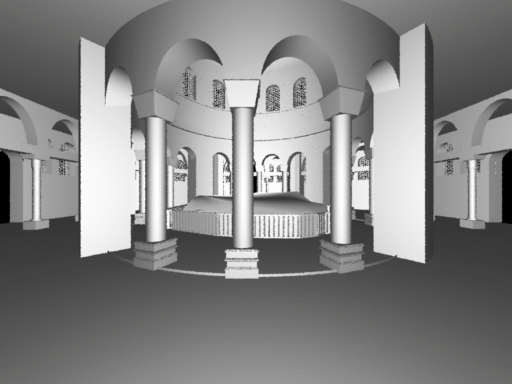
The inside of the building, a closer view
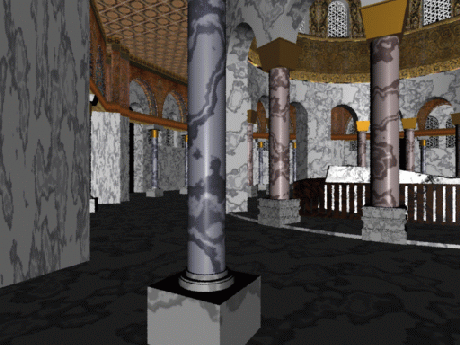
The columns of the Dome of the Rock were all gathered form different buildings. Thus, they all were made out of different color stone and of slightly different height. This was compensated for in the bases of the columns. In our model we made all the coluns the some height, since we had no data on the height of individual columns. Furthermore, all the columns were textured with a procedural approximation of a marble texture. We created one texture for the inner columns, and one texture for the outer columns. Having one texture for each column would have taken too much diskspace. The columns of the Dome are Corinthian. We used simple geometrical shapes to top the columns, realising that the geometrical shape of the original columns would be too complex.
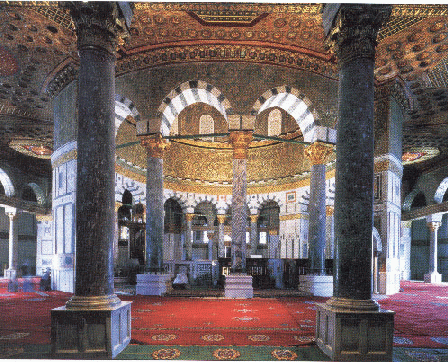
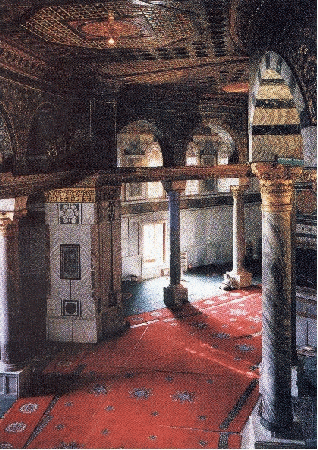
Comparison of photo and rendered image of the interior
We also had to make approximations in applying textures to the model. We did have an abundance of scannable images, but there were some surfaces for which we did not have a picture, or for which the pictures that we did have were unusable. In these cases, we either repeated a similar pattern that we did have a photo of, or we used procedural texturing. For example, there are many surfaces (such as the interior of the outer walls, and the lower portions of the piers) which have marble inlays, or pieces of quartered marble. Since we didn't have photos that were sufficient for image mapping, we procedurally textured these surfaces with a grey marble texture. Other areas where we made approximations:
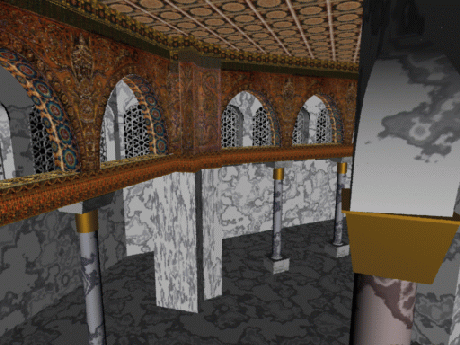
Comparison of photo and rendered image of the interior
We did not have any images of the original railing. After asking advice from Professor Rabbat, Marleigh was told:
"The early sources speak only of a railing made out of some fragrant wood, something like ebony, but no shape or pattern are known."We therefore created a simple railing and textured it procedurally to look like dark wood.
The window screens of today's building are not original. We modelled our window screens based on sketches found in Allen and Creswell's A Short Account of Early Muslim Architecture depicting screens in the Great Mosque of Damascus. This building is from the same perios as the Dome of the Rock, and one can argue that the screens were probably similar.
The walls were each rectangular solids with seven windows cut out. This was done by subtracting cylinder and rectangle shaped solids from the wall solid. The inner ceiling was created as one single polygon by specifying the corner points of the building. The slanted roof was modeled by a cone with a cylinder cut out of the center.
Mike also helped scan in pictures and textured the inner ceiling of the building.
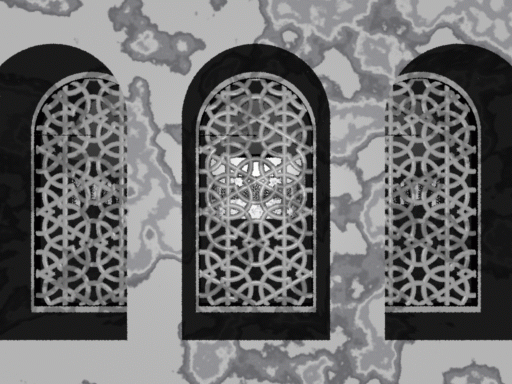
Segment of the outer wall with windowscreens, procedurally textured.
After finishing the geometry, Kari Anne concentrated on procedural texturing. She rewrote shaders form the RenderMan Companion in order to create several different marble textures for the outer walls, the floor, the base of columns and the window screens. She created a copper shader for the outside of the Dome and the top of colums. The wood shader from RenderMan Companion was modified to simulate a lighter shade of wood and applied to the railing around the rock. The rock itself was modified by using a displacement shader that modified the position vector and normal vector of all the points. This gave the rock an irregular, bumpy surface. Furthermore, a shader was applied to make the rock look less shiny.
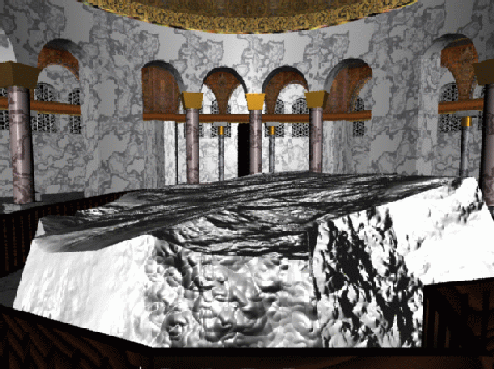
The rock at the center of the dome
While doing this, Kari Anne ended up adding doors to Mike's geometry and adjusting the position of the outer walls. She also scanned in the first set of images to be used for texturemapping.
Marleigh's responsibilities included several things, such as geometry for the dome, rock, and railing, the self-imposed task of "Web Guru", and texturing.
The dome was written in OpenInventor using QuadMeshes for the ribs and IndexedFaceSets for the rest. The actual dome consisted of many rectangles of burnished metal. Marleigh attempted to capture this by making the dome out of rectangles instead of the Sphere primative. She also modelled a finial at the top of the dome. This was a typical finial of a mosque, a spire a few meters tall topped by a cresent moon facing upward.
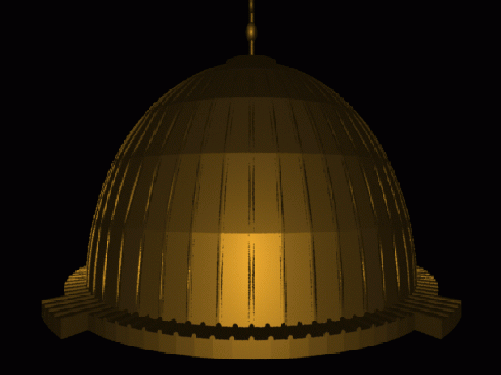
The dome seen form the outside
The inside of the dome was a disc and a wedge cut out of a hemisphere rotated and copied in order to make an inverted bowl, coded in OpenInventor. Doing it this way instead of just making a hemisphere was intended to make texturing easier, since the geometry was repeated in the same manner as the pattern of the texture.
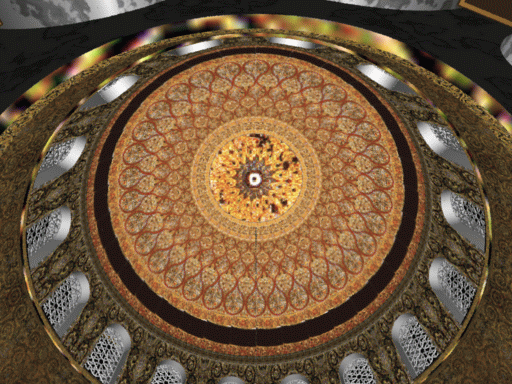
Looking up into the textured inside of the dome
The rock was done in AC3D by taking an outline of the rock on a transparency, holding it up to the screen, and clicking around the edges. This was the only coding done in AC3D. Marleigh insisted on using it because it is much easier to construct irregular objects in AC3D than OpenInventor.
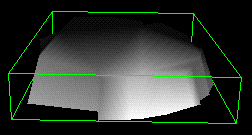
The rock as viewed from the AC3D viewer.
.
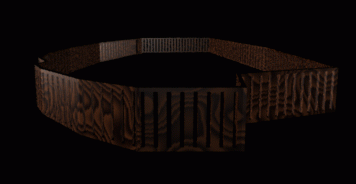
The textured railing.
Marleigh also adjusted the scanned images using Photoshop. Tasks included correcting skew, erasing glare, removing all but the part of the image to be textured and cropping images.
Finally, Marleigh was the "Web Guru". She took it upon herself to make templates for everything we put on the web, taking occasional pictures to put in the final report, and generally making sure everything looked aesthetically pleasing.
Tara was assigned the Octagonal Arcade of the dome. She modelled this in Open inventor. She also modelled the walls, the floor and the inner ceiling in RenderMan.
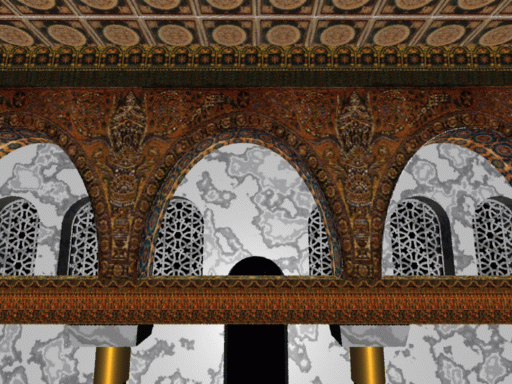
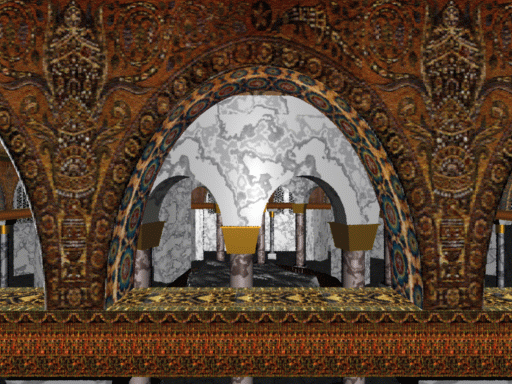
Views of the octagonal arcade
Tara was then put in charge of converting all of the OpenInventor code to RenderMan format. She corrected scale and translation bugs that popped up during conversion. She was also the one who discovered that the converter could not handle QuadMeshes. Luckily, she learned enough of RenderMan that she was able to fix the code that used QuadMeshes by replacing it with RenderMan primitives. She fixed her own, Kari Anne's, and Marleigh's code.
Finally, Tara has been working on texturing. She has done most of the image mapping on the model.
The one main thing we all learned well was that projects always take longer than they ought to. Due to technical difficulties, lack of information, and other frustrations previously mentioned in the report (the QuadMesh Fiasco comes to mind), we ended up behind schedule.
We all learned how to model from blueprints. Each of us (mainly Kari Anne) did research on the Dome to find measurements and pictures. We also discovered that not everything was measured or photographed to our specifications, so we learned to make estimations (see section on accuracy) in order to create a complete model. Prof. Rabbat in the Architecture Department was a great help in figuring out geometry. His guesses had the advantage of being more educated than our own would have been.
As for technical skills, we all honed our OpenInventor coding skills. Tara introduced us all to a fabulous construct in Inventor called QuadMeshes, which we all became adept at using. We also learned enough about AC3D to realize that it was almost completely unsuited to our needs. The one hold out was Marleigh, who modeled the rock in AC3D. Mike and Marleigh also learned to use C code in order to generate OpenInventor files. This method was used extensively by all members of the team.
Dealing with images was another big time sink. Kari Anne learned to use a scanner and Marleigh had her first experience with Photoshop, which she became rather good at using. She also saw her first zip disk.
RenderMan was a language we all learned. None of us had any experience with it before this project. Tara is probably the resident expert, since she also had to deal with the IV to RenderMan converter and fixing it where it messed up. Marleigh learned enough of Renderman to move things around and take nice pictures. Kari Anne specialized in displacement mapping and procedural texturing.
Some sites found on the Web:
Our model of the Dome of the Rock is written in the RenderMan interface language. The geometry is specified with the positive z axis pointing up and the positive y axis pointing north. The mean floor level is at z=0. Our entire model is contained in one RIB file, which was created by cutting and pasting RIB files created by each of the team members. The still images in this paper were rendered on an SGI Indy using the render shell script, (i.e. render dome-of-the-rock.rib) which submits the RIB file to the default RenderMan renderer. Although the renderer outputs TIFF files, we converted to GIF and re-sized most of the images included in this document in the interest of saving space.
The various camera angles for each still image were specified inside the RIB file directly. The RenderMan camera is always at (0, 0, 0) pointing along the positive z axis: as a result, most of our images are rotated -90 degrees around the x axis to make our "up" direction actually point up, and then further translated and/or rotated to adjust the view. (Note that rotations around the axes follow the "left hand rule" in RenderMan.)
Our procedural shaders were written in the RenderMan shading language. The shading language source files (*.sl) are compiled using the shader command, resulting in the files (*.slo) suitable for execution in the renderer's run-time environment.
The original scanned images that we texture mapped onto our geometry were converted to the appropriate format for textures (*.txt) using RiMakeTexture(), a RenderMan subroutine.